Easily Add Social Logins to Your website with Socialite
Laravel Development provides a simple, convenient way to authenticate with OAuth providers using Laravel Socialite. Socialite currently supports authentication with Facebook, Twitter, LinkedIn, Google and GitHub.
Adding Social Authentication.
To get started with Socialite, we install it with Composer:
composer require laravel/socialite
Socialite package successfully install after add providers and alias in config/app.php
Providers:-
   'providers' => [

              // ...

              Laravel\Socialite\SocialiteServiceProvider::class,

       ],
Alias:-
      ‘aliases:  =>  [

                         // …

                        'Socialite' => Laravel\Socialite\Facades\Socialite::class,

       ],
Create model:- SocialProvider
       protected $table = 'social_providers';

                protected $fillable =['id','user_id','provider_id','provider'];

               function user(){

                           return $this->belongsTo(User::class);

               }
Create migration for the table:-
php artisan make:migration create_social_providers_table --create=social_providers
Put your code like this in database/migrations/…create_social_providers_table.php:
public function up(){

        Schema::create('social_providers', function (Blueprint $table) {

            $table->increments('id');

            $table->integer('user_id')->unsigned()->references('id')->on('users');

            $table->string('provider_id');

            $table->string('provider');

            $table->string('profile');

            $table->string('remember_token');

           $table->timestamps();

        }); }
- create SocialLoginController in your project
- Add below mentioned two classes at top of the controller:-
     use Auth;
     use Socialite;
- In SocialLoginController code look like this:-
// function create for index page

public function index()

{

return view('social_login.index');

}

// function create for redirect on provider

public function redirectToProvider($provider)

{

return Socialite::driver($provider)->redirect();

}

// function create for provider handle and create

public function handleProviderCallback($provider)

{

$user = Socialite::driver($provider)->user();

$authUser = $this->findOrCreateUser($user, $provider);

Auth::login($authUser, true);

return view('social_login.index' ,compact('authUser'));

}

public function findOrCreateUser($user, $provider)

{

$authUser = SocialProvider::where('provider_id', $user->id)->first();

if ($authUser) {

return $authUser;

}

$fileContents = file_get_contents($user->getAvatar());

// dd($fileContents);

File::put(public_path() . '/socialite_profile/' . $user->getId() . ".jpg", $fileContents);

return SocialProvider::create([

'user_id'     => $user->id,

'provider_id' => $user->id,

'provider' => $provider,

'profile' =>  $user->getId()

]);

}
Create Routes in routes/web.php
   Route::get('social/login',[ 'as'=> 'social.index', 'uses'=> 'social_login\SocialLoginController@index']);

   Route::get('auth/{provider}','social_login\SocialLoginController@redirectToProvider');

    Route::get('auth/{provider}/callback', 'social_login\SocialLoginController@handleProviderCallback');
Facebook Login using Socialite:-
- First, register yourself at https://developers.facebook.com.
- In the topmost right corner click My Apps.
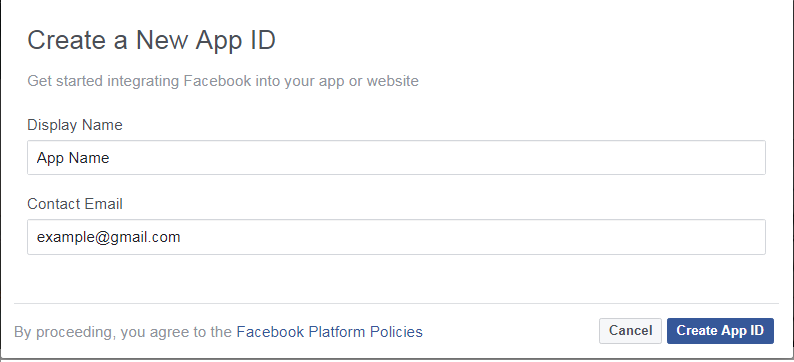
- Before now, if you never developed a Facebook app, click ‘Add New App’ button. Otherwise, select your previously created apps.
- If you Create New App, Fill your app details and get your New App ID.
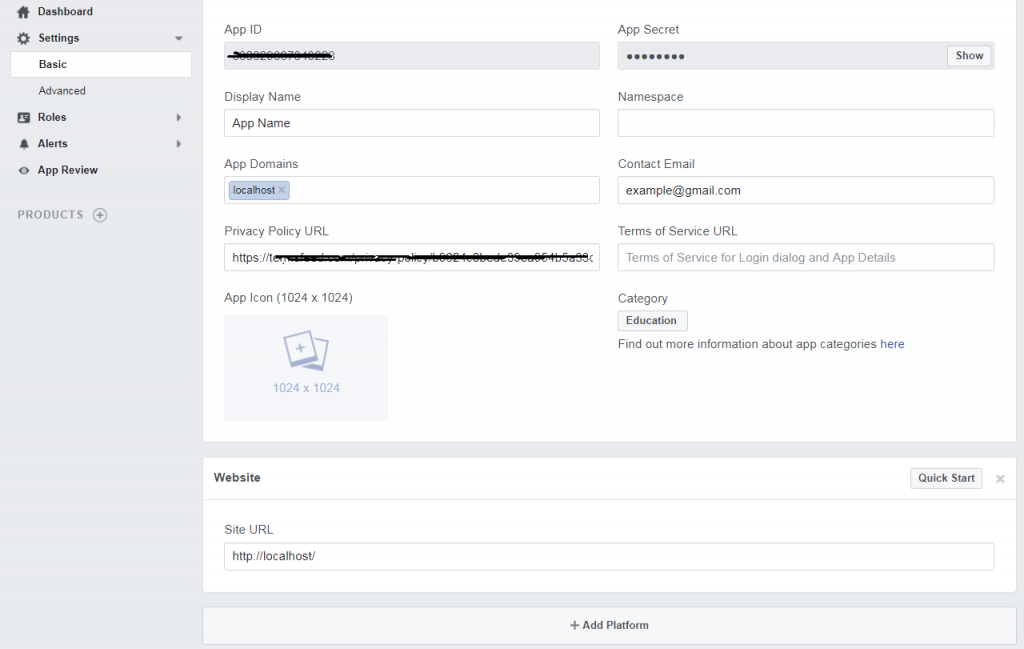
- After that to create a sample App, go to the setting section as shown in the below-given figure, go to Basic Setting and fill detail like ‘app domain’, ‘privacy policy URL’ and ‘select category’, then go to the bottom, click on Add Platform and select website and put URL.
You generate privacy policy url help for site https://termsfeed.com/blog/privacy-policy-url-facebook-app
- Your App ID and Secret key generated successfully. Now you can use it in your .env file and put that like this.
          FACEBOOK_ID=  { id }

          FACEBOOK_SECRET= { secret key }

          FACEBOOK_URL= http://localhost/auth/facebook/callback
- Also, put your code in your config/services. php
    'facebook' => [
                   'client_id' => env (FACEBOOK_ID),
                   'client_secret' => env (FACEBOOK_SECRET ' ),
                  'redirect' => env (FACEBOOK_URL’)
          ],
Here, FACEBOOK Login is Successfully created. Now check it in your project.
Google Login using Socialite:-
Register your app on https://console.developers.google.com/apis.
- From the project drop-down, select an existing project, or create a new one by selecting Create a new project.
- Enable the Google+ API service:
- Select Google+ API from the results list.
- Press the Enable API Wait for the API to be enabled.
In the Credentials tab, select the New credentials drop-down list, and choose OAuth client ID.
In Application type, select Web application.
- Register the origins, from which your app is allowed to access the Google APIs, as follows. An origin is a unique combination of protocol, hostname, and port.
Register the origins, from which your app is allowed to access the Google APIs, as follows. An origin is a unique combination of protocol, host-name, and port.
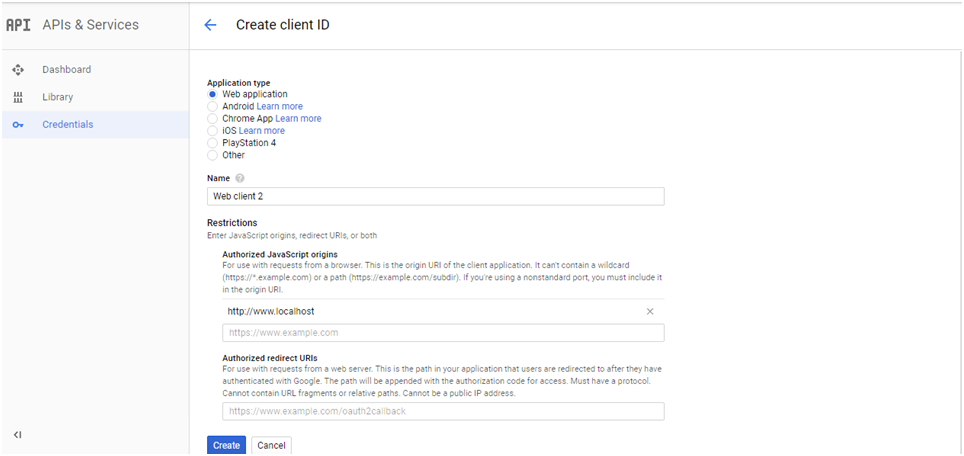
Press the Create button.
From the resulting OAuth client dialog box, copy the Client ID and Client secret. Now your app access enabled Google APIs for your project.
Now you can use it in your .env file and put that like this.
     GOOGLE_ID={ id }

     GOOGLE_SECRET={ secret key }

     GOOGLE_URL=http://localhost/auth/google/callback
Also, put your code in your config/services. php
    'google' => [

        'client_id'     => env('GOOGLE_ID'),

        'client_secret' => env('GOOGLE_SECRET'),

        'redirect'      => env('GOOGLE_URL')

          ],
Here, Google Login is Successfully created. Now check it in your project.
GitHub Login using Socialite:-
- Register your app on https://github.com/
- Go to setting and developer setting.
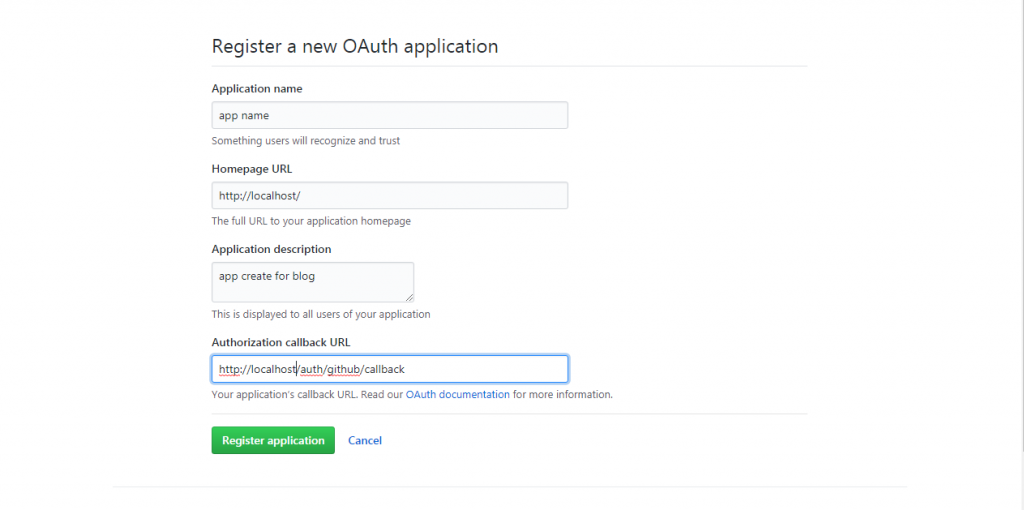
- Click on New OAuth App.
- Fill all the information in the below mentioned form and click on Register Application.
- After Click on ‘Register application’ button your Client Id and Client Secret key generated successfully. Now you can use it in your .env file and put that like this.
     GITHUB_ID =  { id }

     GITHUB _SECRET={ secret key }

     GITHUB _URL =http://localhost/auth/google/callback
- Also, put your code in your config/services. php
         'github' => [

         'client_id' => env(GITHUB _ID'),

         'client_secret' => env(GITHUB _SECRET'),

         'redirect' => env(GITHUB _URL'),

                  ],
Here, Github Login is Successfully created. Now check it in your project.
Twitter Login using Socialite:-
- First, register your app on https://apps.twitter.com/
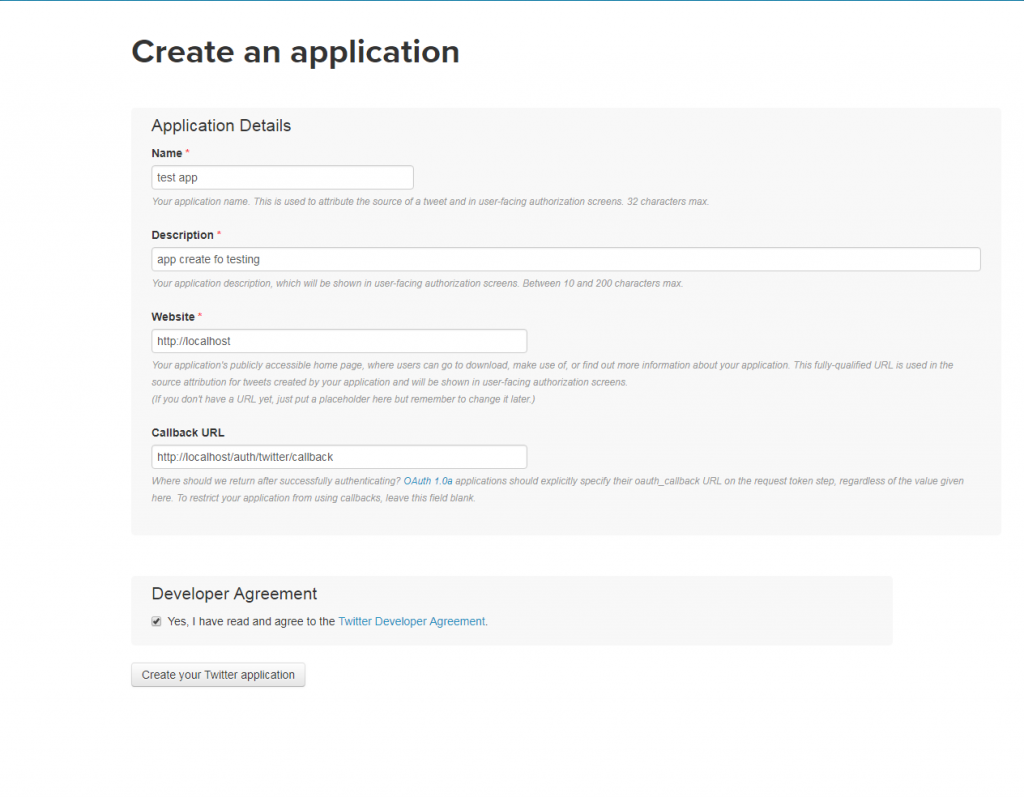
- Click on Create New App button and fill all information and create your twitter
- After click ‘Create your Twitter application’ button go to ‘Keys and Access Tokens’ and copy your API Id and API secret key and past in your .env file
   TWITTER_ID={ ID }

   TWITTER _SECRET={ Secret Key }

   TWITTER _URL=http://localhost/auth/twitter/callback
- Also, put your code in your config/services. php
'twitter' => [

                    'client_id' =>  env(TWITTER _ID'),

                    'client_secret' =>  env(TWITTER _SECRET'),

                   'redirect' => env(TWITTER _URL'),

          ],
Here, Twitter Login is successfully created. Now check it in your project.
LinkedIn Login using Socialite:-
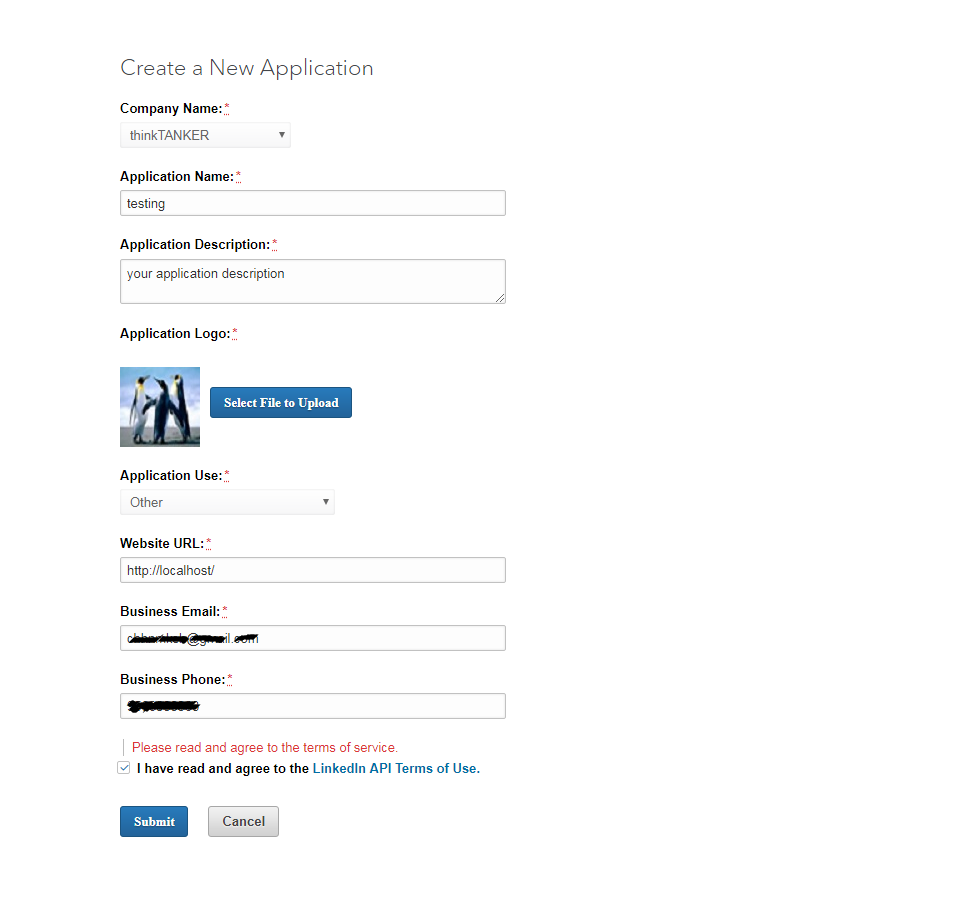
- Create your app on https://www.linkedin.com/developer/apps
- Click on Create Application and fill out all information about your site.
- After click submit button, your Client Id and Client Secret key are ready to use in .env
linkedin_ID={ ID}

linkedin_SECRET= { secret key }

linkedin_URL=http://localhost/auth/linkedin/callback
- Also, put your code in your config/services. php
'linkedin' => [

        'client_id' => env('linkedin_ID'),

       'client_secret' =>env('linkedin_SECRET'),

        'redirect' =>env('linkedin_URL'),

 ],
Here, LinkedIn Login is successfully created. Now check it in your project.
Thank you.
Happy Coding.
